As we all know, having an independent version management system is extremely important for a team. Even though there are many excellent products in this regard, such as GitHub, Gitee, and so on. However, YDJSIR, who tried to explore new possibilities, did not do so. YDJSIR attempts to localize the code repositories
to ensure our team’s privacy and controllability.
Consequently, YDJSIR selected GitLab. Currently, this GitLab is merely used by YDJSIR and ABN-Team, which manages to function well.

GitLab can take up nearly all the resources, and YDJSIR has to do experiments on other servers
When considering the performance of Aliyun’s student’s server, YDJSIR selects GitLab中文社区版8.85 rather than the official mirrors. Here is YDJSIR’s experience.
This refers to a special version of GitLab which is specially optimized and translated
1. Basic Steps of Installing
Environments
| Projects | Content |
|---|---|
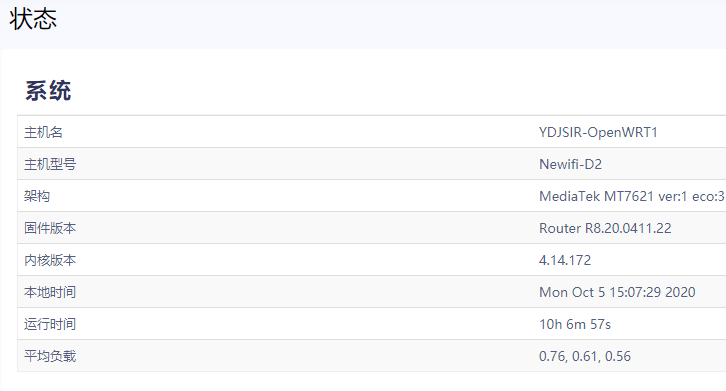
| Hardware | Aliyun Student’s Server |
| System | CentOS 7.6.1810(Py2.7.5)x64 |
| BTPanel | Free 7.2.0 |
BTPanel has been modified into quite simple and clear for beginners. Select GitLab中文社区版 in the APP store and install it.
You can also abandon the original Nginx of GitLab and force it to embrace BTPanel’s Nginx.
BTPanel itself also provides functions about Gitlab, such as GitLab’s essential configuration modification and monitoring of the status of GitLab’s services. However, there is no picture above, because YDJSIR has modified the configuration file, which makes BTPanel can no longer manage my GitLab. )
At the first time, you enter the GitLab system, and you will need to fill in some basic parameters, such as setting the Root account password, the system’s initial key (the BTPanel’s GitLab management panel provides the function of generating an RSA key, which is very practical) and so on.
The GitLab中文社区版 installed by the BTPanel claims that it does not support occupying the 80/443 port. If you need to use these two ports, users can perform reverse proxy/use Nginx of the BTPanel system configuration (the previous solution mentioned above can achieve it naturally).YDJSIR decided to choose the way of reverse proxy after reading various tutorials.
reverse proxy
2. Basic Configurations
1. External link + Email Settings
Here we need to reconfigure GitLab to enable our changes.
Here are some common commands.
1 | # Reconfigure gitlab, must be run after modifing `/etc/gitlab/gitlab.rb` |
Most of the options in the configuration file are turned off by default.
If you want to enable a function, please make sure that you open all related configuration items.
Here are some explanations for a few settings.
Lines 11 - 25
1 | external_url 'https://git.ydjsir.com.cn' |
Lines 294-309
Netease’s 163 mailboxes are used here. The following configuration basically cannot lack any of the thems. Netease mailbox already supports SSL and TLS transmission by default, so these options should be turned on. Port should use 465 instead of 25.
1 | ################################ |
Lines 514-518
YDJSIR adopts the way of modifying GitLab’s configuration file separately, so this part of the settings can be ignored. However, as can be seen in this part, YDJSIR only listens to the local reverse proxy to ensure security when the port forwarding settings are enabled. It was also foreshadowing that YDJSIR’s reverse proxy is always not entirely safe.
1 | nginx['enable'] = true |
We will come back here later.
2. GitLab Backstage Settings
- Login the GitLab system as
root.The root user can also be used as an ordinary user, even though it is not recommended.
- Some Additional Words
As GitLab is quite user-friendly, you can learn about the configurations via reading the instructions.
Particular attention should be paid to the Appearance section, which can let you customize the appearance of your login page.
You can see my GitLab’s appearance here.
YDJSIR’s GitLab is private, so YDJSIR only allow those I know to register.
Detailed Configuration is here, while these two settings can be noticed.
The first configuration item, which can set a forced redirection for visitors who haven’t logged in to an URL, can be harmful when you are changing new domains. But of course, when you are trying to visit the login page, it will not be redirected to the URL you set.
3. Configuration on the Network
The following content describes how to configure a reverse proxy, redirection, etc., and finally achieve the access effect shown in the above figure.
3.1 Fix the Problem Caused by the Path of Nginx
After the above configuration is done, you will find that GitLab is working correctly except the Nginx service, which can be quite annoying. Okay, that is how neurotic BTPanel is. To prevent two Nginx from conflicting, the BTPanel changed the path of GitLab’s Nginx during installation. Therefore, you have to correct the path to start Nginx. Of course, since you have reconfigured GitLab, you can’t use the BTPanel’s interface to manage the GitLab. But it’s okay, it’s all there. Nowadays, do you still need BTPanel to manage your GitLab?
1 | vi /opt/gitlab/sv/nginx/run |
Change
1 | exec chpst -P /opt/gitlab/embedded/sbin/nginx -p /var/opt/gitlab/nginx |
To
1 | exec chpst -P /opt/gitlab/embedded/sbin/gitlab-web -p /var/opt/gitlab/nginx |
Then you should restart GitLab’s Nginx.
1 | gitlab-ctl stop nginx |
Remember: you should use stop and start here rather than restart.
If you seeokay: run: nginx: (pid XXXXX) 0s, congratulations! Your Nginx is working well!
Here’s another solution. You can try to copy the files to the wrong path.
References: https://www.syblogs.com/p/21.html
However, it cannot guide BTPanel recognize your GitLab
3.2 Configurations of GitLab’ Nginx
Let us fetch the configuration file first.
1 | cd /var/opt/gitlab/nginx/conf |
Warning: This file will be overloaded when reconfiguring your GitLab!
1 | upstream gitlab-workhorse { |
Then you should restart GitLab’s Nginx.
1 | gitlab-ctl stop nginx |
3.3 Use Reversed Proxy to Adopt HTTPS
3.3.1 SSL Certificates
YDJSIR chose Alibaba’s free DV certificate first and finally turned to Let’s Encrypt.
Create a new website on BTPanel’s Website page. Remember, don’t use PHP, database, FTP, or any other things; just full static solution is enough. Then bind your favorite domain name (which you have already applied for the SSL domain name in the previous article), then add your certificate. This One step is done in the SSL item in the BTPanel’s website settings. You can choose to fill in the certificate elsewhere, or you can directly apply for the Let’s Encrypt certificate by using the BTPanel’s tool.
After the SSL configuration is done, if there is no problem, please open the forced jump HTTPS to ensure the experience. The BTPanel forces non-443 ports to rewrite URL redirects to HTTPS access links, and the effect is good.
Note that if you are using the reverse proxy and the 301/302 redirect, Let’s Encrypt automatically renews the file method will be invalid. Hence, YDJSIR recommends that you first bind the SSL certificate before performing the following operations. Of course, you can use domain name authentication to renew your SSL certificate to prevent future troubles. YDJSIR has just completed this step. Because the domain name verification supports wildcards, as long as one is enabled, BTPanel will replace all the certificates with wildcard certificates, which can be very smart. As for file verification, just leave it to the BTPanel.
When adding a generic domain name, please directly operate the website bound with the default domain name prefix (@ or www). After clicking Apply, BTPanel will guide you on how to fill in the DNS modification method. You can choose to provide AccessKey to BTPanel to make it automatically modified. You can also add records manually. Add the DNS records required by the BTPanel, click on the authentication, and the BTPanel will automatically deploy the certificate and enable SSL.
The expected result
3.3.2 Reverse Proxy
Let us build a new website in BTPanel’s GUI used for reverse proxy. Select the 反向代理 section and add new settings. Remember, don’t use PHP, database, FTP, or any other things; just full static solution is enough. Then bind your favorite domain name (which you have already applied for the SSL domain name in the previous article), then add your certificate. This One step is done in the SSL item in the BTPanel’s website settings. You can choose to fill in the certificate elsewhere, or you can directly apply for the Let’s Encrypt certificate by using the BTPanel’s tool.
What we are doing here is similar to what called “port forwarding.”
Note: When entering the IP address directly in the GUI of the BTPanel, the BTPanel will report an error, but this problem will not occur if you directly modify the configuration file. It is recommended to start with a domain name, and then enter the configuration file to force the chaos anyway. This is just for demonstration. You can change the data directly, while the GUI may not be updated.
The so-called advanced function here is that you can specify a directory for your reverse proxy. For example, if your homepage is https://example.com, then your GitLab can be mounted at https://example.com/gitlab. You make your decision based on your needs.
A cache is not recommended. Click 配置文件 which means configuration file to modify the settings.
1 | #PROXY-START/ |
At this point, you will find that you have access to your lovely GitLab with a brand-new domain name in HTTPS. However, you will find that you will be thrown to the domain name written in the GitLab Nginx configuration file from time to time. However, your domain name does not listen to the public so that you will see an error. ABN-Team has a great response to this problem. This problem occurs when submitting files and logging in the web version. Although it does not affect the actual data submission, it dramatically influences the user’s experience. Below YDJSIR proposes a partial solution.
3.3.3 Redirecting
Of course, we are against all wrong domain name access. If you are cruel, you can return 404 for those access from illegal domain names. So in the Nginx configuration file, you can add this.
1 | location /server { |
Here we will not be so brutal due to the above redirection (mentioned in the configuration of the GitLab’s Nginx’s settings). In this “website” of reverse proxy, YDJSIR recommends that you set it in this way. The reason why YDJSIR does not place it in this way is that the Nginx of YDJSIR’s BTPanel already has a default illegal domain name access error page (one each for HTTPS and HTTP).
After that, we build a new website in Nginx that is bound to GitLab and does not listen to the external network’s domain name. This operation ** will not cause conflicts, because it is two Nginx, and the other Nginx does not Care about what happens on the extranet) This operation is performed in the graphical interface of the pagoda. By convention, this site does not require PHP, database, or the like. Then in the settings, select redirect (beta), and then add the following Directional way:
Of course, in your DNS settings, you must also resolve this record to the server where GitLab is located.